Thursday, March 10, 2011

SALAD FOR ALL with PUY LENTILS, PUMPKIN AND RICOTTA

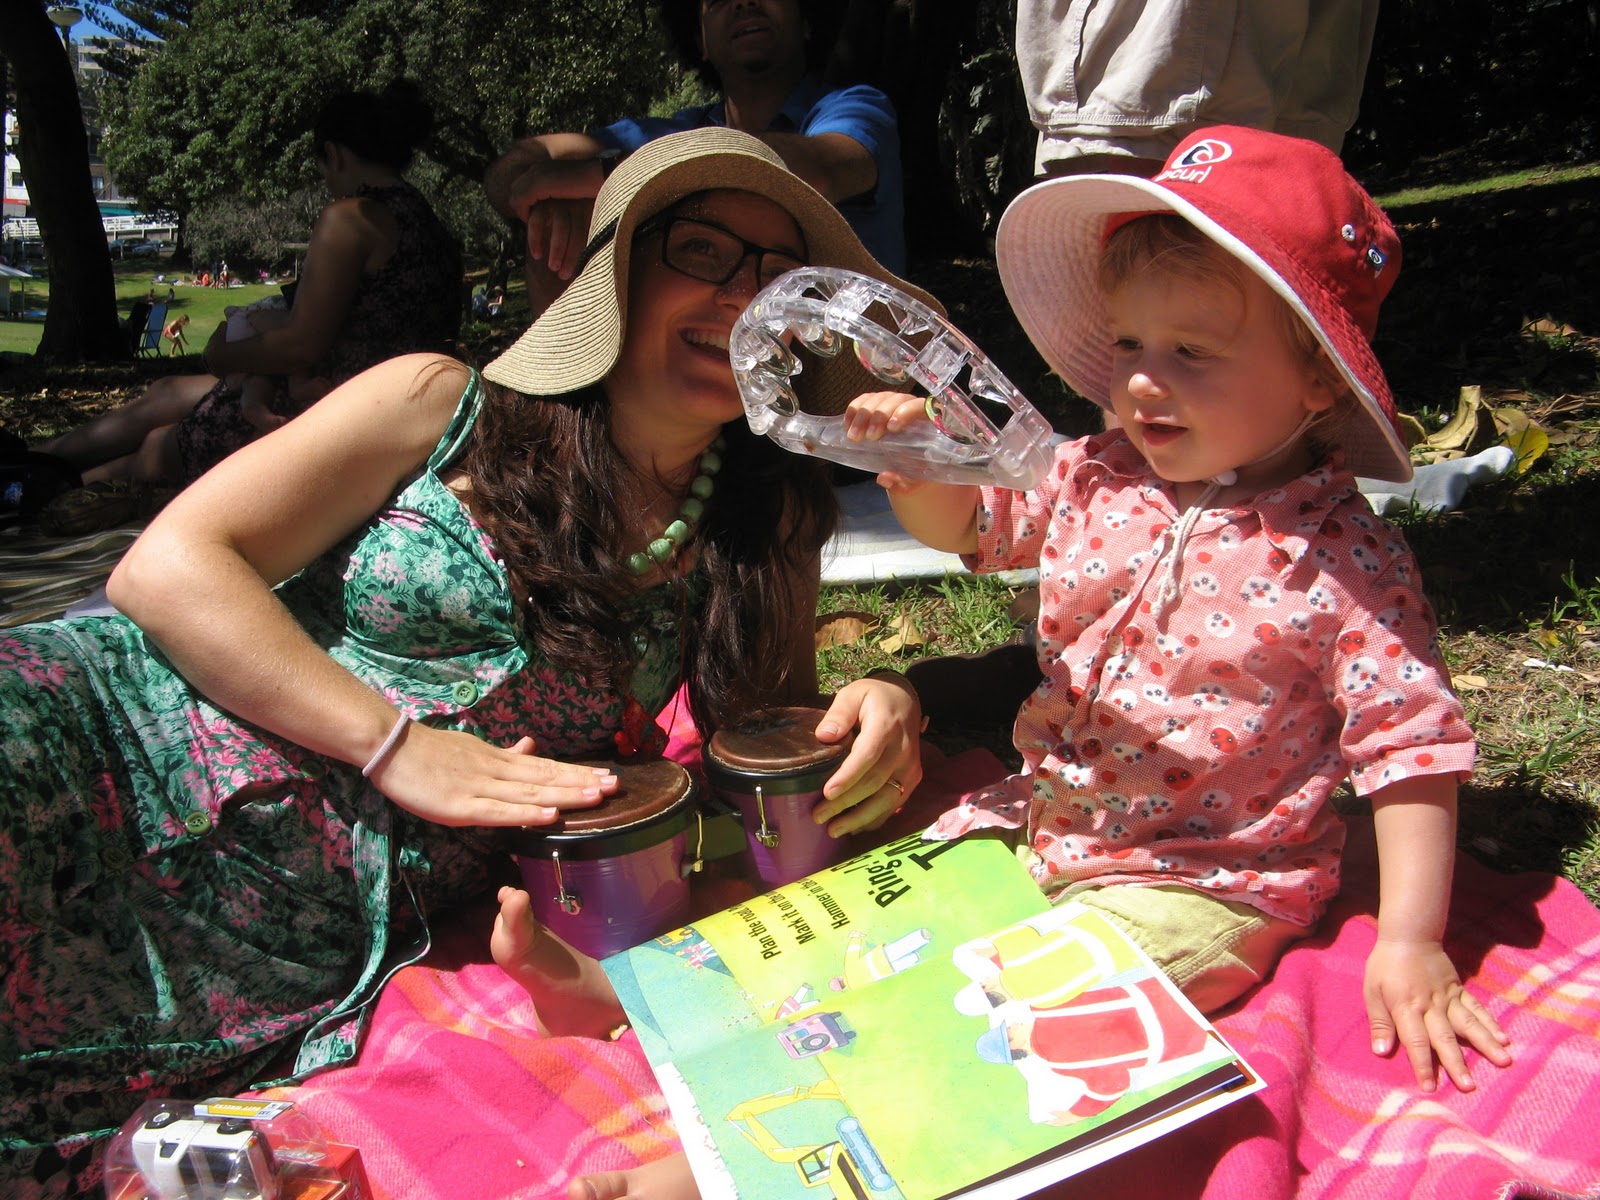
When a Melbourne friend announced she was in town and popping in for lunch with her 7.5 month-old baby, I knew it was time to really test out the Billie Bites philosophy.

Could I come up with a dish that would inspire and nourish two adults, a toddler and a baby newish to solids?

BINGO. Mission accomplished. And while this is similar to other salads listed here, it's different enough to warrant fulfilling my guest's request for the recipe.

Oscar hadn't had lentils or ricotta before, but he happily consumed a fair serving of the two, mashed with some roasted pumpkin. I chose ricotta because it doesn't have any added salt - good for babies under one year.

Billie chose on this occasion to pick out the lumps of fresh ricotta. But we know she normally devours anything from the pulse/bean family. Pumpkin these days goes down if it's mixed in with other stuff, or is the only thing on offer.

And Emily and I devoured my cherry tomatoes freshly picked from the back-yard.

Here we have a meal for all. Family friendly, vegetarian and gluten-free.


SALAD FOR ALL with PUY LENTILS, PUMPKIN AND RICOTTA

1 cup French puy lentils, rinsed
1/4 pumpkin, skinned and chopped into bite-sized chunks
olive oil
large handful French green beans, topped and tailed and cut in half
handful cherry tomatoes
few slabs of fresh, firm ricotta (avoid the runny stuff in the tub)
1 lime, juiced
1 tablespoon balsamic vinegar
3 tablespoons extra virgin olive oil
salt and pepper


Preheat oven to hot. Place lentils in small pot with 3./4 cup water and bring to boil. Turn to low and simmer with lid until water absorbed or just soft - about 20-30 minutes. Place pumpkin on oven roasting tray and rub with olive oil. Roast until soft and crispy around edges. 


Steam beans until just soft. Mix lime, balsamic, olive oil and salt and pepper and stir through drained lentils, beans and tomatoes in a large serving platter dish. Top with pumpkin and slabs of ricotta.


FOR BABIES 6 MONTHS AND UP: Reserve some pumpkin and puree
BABIES 7 MONTHS AND UP: Reserve some lentils and pumpkin and mash or puree with ricotta
BABIES/TODDLERS 1 YEAR AND UP: Serve salad as is - let them pick what they like. It's all good


Friday, March 4, 2011

PIZZA WITH BROCCOLI SAUCE, FETA, SPINACH AND GARLIC


Pizzas ready to go in the oven - although Billie couldn't wait

Showing you how to make pizza could be like telling you how to suck eggs. But there are some superb tricks here. And today when my friend Anna (who's a very good cook) was impressed and inspired sampling a cold left-over piece, I decided it was a valid exercise. Oh, and I have to credit Miles here as I was inspired by his innovation.

The two main tricks here are: 

*For the base, use thin round flat 'Lebanese bread' - they are cheap, cook very quickly and retain a nice texture

* Instead of straight tomato, pack some super foods into the base sauce. It tastes nice, but most importantly toddlers can't avoid the vegetables

Pizza post-oven


Now, I'm not normally a fan of pumpkin on pizza. However, Miles created a delicious pumpkin-based vegetable blend to spread over our vegetarian pizzas this week. HIs motivation was a lack of tomato stuff in the cupboards, but also to get some more veggies into young Billie.

Last night I followed up with a full head of fairly well-steamed broccoli, blended in with a few dollops of tomato paste. Billie scoffed back most of her large pizza before it even went near the oven.

(And yes, those are cherry tomatoes from our garden. Grown from seed. Very proud of myself.)

Obviously you can follow the vegetable paste with any topping you fancy, but here's what worked very well last night:


PIZZA WITH BROCCOLI SAUCE, FETA, SPINACH AND GARLIC

Makes three pizzas, feeds about four
Large, flat, round and preferably wholemeal Lebanese breads
Head of broccoli, cut into large chunks and steamed until softish
4 tablespoons tomato paste
Small bunch English spinach, washed and chopped
5 spring onions, top and tailed and finely sliced
4-5 cloves garlic
1/2 block feta
several big handfuls grated cheddar cheese
handful of cherry tomatoes, sliced in thirds
capers
Fresh basil and oregano - lots
black pepper
Olive oil

Preheat oven to medium hot.

Lightly saute spring onions and garlic in olive oil until soft. Add spinach and remove from heat after 30 seconds - you just want to shrink it down a little, but it will get plenty of cooking in the oven. Blend broccoli and tomato paste. Spread generously on bases. Sprinkle a little cheddar on each. 

Spread the spinach mixture over the three pizzas, followed by a sprinkling of capers on each and some chopped fresh herbs. Crumble the feta over each, a good grind of pepper (no salt needed with feta), the rest of the cheddar, and distribute the cherry tomato slices. 

Place on oven trays and cook until cheese well melted and bases crispy around the edges - they will blacken a little. Slice and serve immediately. 


Pizza pre-oven

Sunday, February 27, 2011

SUPER PATTIES with TOFU, BROWN RICE AND WALNUTS


I call these super patties because they are delicious cold, filling enough to make lunch - or dinner if you take two - and extremely healthy.

They also happen to be gluten-free and vegan if you're entertaining somebody in those camps.

And yes, Billie happily scoffed back the mixture before it even hit the fry-pan.

I do owe a big shout-out to Iku, the fantastic vegetarian whole foods cafe I drew inspiration from. Iku's don't have walnuts, and I think they must deep-fry to get them totally crispy. I don't actually know what Iku puts in theirs, but this was my attempt at imitation:


SUPER PATTIES with TOFU AND BROWN RICE


1 cup brown rice
Toddlers, babies and adults will love these patties
1 block of firm tofu (about 250-300 gms)
1 Tablespoon brown rice vinegar (optional)
5 Tablespoons tamari (soy sauce if none available)
1/2 cup walnuts (optional, or use other nuts)
1/4 cup poppy seeds
two handfuls fresh herbs  (I used dill, oregano and thyme beause that's what's in the garden)
2 spring onions, finely chopped
Rice bran oil, or other good cooking oil


Cook brown rice in 2 cups cold water in small pot. Bring to boil then turn right down to slow simmer, leaving lid on and not stirring at all. Turn off once water gone. Pour into large bowl to cool.


Break tofu into pieces and place in food processor or bowl where you can use hand-held blender. Pour tamari and brown rice vinegar on top and blend until thick paste - doesn't need to be completely smooth. Add walnuts, spring onions and herbs and blend again. Remove from processor and add to rice with poppy seeds. Check seasoning then use wet hands to form LARGE flat round patties. These work well as very big patties. Place on plate in freezer for 30-60 mins, or fridge if leaving for longer.


Pour enough oil into fry pan so you can shallow-fry - about half as high as the patties. Heat on medium until hot and then drop some patties in. Cook on medium for about 5-8 minutes or until browned and crispy, then turn and repeat. Try to just turn once in order to avoid breakage. Place on paper towel on plate and eat hot, warm or cold. They don't even need sauce.


Billie collects sticks at the Wentworth Falls lake

Saturday, February 19, 2011

Tacos with Chili Beans


I have been a burrito addict since I visited San Francisco when I was 18. But lately I've been getting into tacos.

Why? Well in restaurants they're often offered with more delicate, flavoursome fillings than your chunky burrito - no rice allowed. You can opt to just eat one or two tacos for a snack. They're fun to make at home sitting around the dining table. And toddlers love 'em.

But tacos must be soft. For some reason the tacos that made it to New Zealand during my childhood were hard, crunchy and very difficult to eat. Ideally you want soft corn mini tortillas that you heat in the oven before filling.


Billie's still getting the hang of the Mexican thing - she's mastered nachos but when handed a taco she tends to separate the tortilla from the filling and eat one at a time. Mind you, she's been doing that with pizza this week too.

I have a standard vegetarian chili/refried beans recipe that I use for burritos, nachos, tacos and everything in between. I made it up shortly after dining out on that fabulous Mexican food in California. Fifteen years later I still use the same recipe.


SARAH'S CHILI BEANS

3/4 cup dried black or kidney beans, or one tin
2 tablespoons olive oil
1 onion, chopped
4 cloves garlic, finely chopped
1 tin tomatoes
1 lemon, squeezed
1 Tablespoon honey
1 tablespoon tamari or soy sauce
1 tablespoon cider vinegar (or white wine vinegar)
2 teaspoons salt
2 tablespoons tomato paste (optional)
chili to taste - fresh, powdered, paste (whatever you have, but don't be too shy)


Soak and cook beans, or open tin. Heat oil in fry pan and saute onions and garlic. Chop tinned tomatoes and pour into pan with juice. Add rest of ingredients, while stirring over a medium-low heat. Simmer on low until reduced down a little. For tacos you want quite a dry chili, but if serving just with rice etc or with corn chips for nachos then don't reduce as much. Check seasoning.


Meanwhile, prepare other taco ingredients. Last night we used grated cheese, fresh chopped tomatoes, some guacamole, and a little spinach and coriander (from the garden, no less). Heat stack of tacos in foil on middle shelf in moderate oven for five minutes. Keep wrapped in foil to serve, removing as you use them. Place bowls of cheese and other fillings on table and dig in.


Sunday, February 13, 2011

MUFFIN MANIA

Muffin mania began in our household when I was pregnant with Billie. Something about nesting brought out the baking urge in me. We're talking sweet, savory and everything in between.

Billie is nearly 18 months and I haven't kicked the habit. Much to Miles' pleasure, as his regular cafe order is a muffin with his soy honey latte (uggh - not my cup of tea). But we're both regularly disappointed with cafe muffins - too dry, lacking in the key ingredient as advertised, and generally just large and floury. So one of the reasons for muffin mania is to fill a necessary gap in the market.

But the main motivation has become the creative challenge. I just use what's around to flavour them, backed up with an easy and relatively healthy muffin base. I do fiddle with the base a little too - sometimes one egg, sometimes two, and sometimes less oil or milk. But the main creative challenge offered by muffin mania is balancing the chosen extra ingredients so that you wind up with a muffin that isn't too dry, moist, sweet or bland.

Happily I can report no complete failures, but I will note polenta is a challenging ingredient.

A few muffin varieties can be found in these pages but often I don't bother to log them. However, due to popular request, today Billie Bites starts a special Muffin Mania page. which I will add to irregularly. It's useful for me too as I often think, hmmm, what were those muffins I took to so-and-so's?

To kick start, today we have these healthy savory numbers - another way to get vegetables into toddlers.

I served them yesterday to Billie and her friend Marilla (born only one day later). Both toddlers devoured two and a half muffins. Now that's a fair bit of carrot.

Billie and Marilla eagerly await their carrot and corn muffins


CORN, CARROT AND CHEDDAR MUFFINS

1 large carrot or 2 small, grated
1 cup grated tasty cheddar cheese
1 corn cob, raw
1 handful fresh herbs, chopped - I used basil, oregano, thyme
220g self-raising wholemeal flour, or use plain and add 2 teaspoons baking soda/powder
3/4 cup milk
1 egg, lightly beaten
1/2 cup oil - I use rice bran
salt and pepper

Preheat oven to medium - about 190 c or 380 f. Prepare 12 muffin tins - depending on what sort you use. I have recently started using those silicon ones so only a very light smear of oil is needed. 

Sift flour and baking powder/soda if using into large bowl. Add cheese and herbs and salt and pepper.

In a small bowl mix eggs, oil and milk together. Slice raw corn kernals off by placing cob horizontally on chopping board and add to wet ingredients with carrot. 

When you are ready to bake, gently combine wet and dry - only swiftly stirring until just mixed through. Then quickly and gently spoon into tins. Bake in middle of oven for about 15-20 minutes or until browned on top.

Leave for 5 minutes in tins before removing to cool on wire rack. Eat fresh. They don't even need butter.
Marilla wonders why her lunch is being photographed

Tuesday, February 8, 2011

RICOTTA, CORN AND COURGETTE FRITTERS

TRICK: Fritters re-heat very well in the oven ready to be served as tasty party finger food.
TRICK 2: Fritters offer a great place to hide greens from toddlers who deem them uncool.


Fritters have made appearances in various guises on these pages, even corn fritters. When Billie was a baby I made lots of simple vegetarian fritters. But each time I get in a fritter mood I experiment with texture and substance - to flour or not to flour, to baking powder or not, and so on.

This particular model was a roaring success with Billie but also was very well received at a work do last night to farewell our colleague Ronan. I had pre-party jitters about how the  re-heating would go. But no fear - ten minutes in the oven on a tray left them perfectly light and crispy.


RICOTTA, CORN AND COURGETTE FRITTERS


4 corn cobs, lightly steamed
4 spring onions, finely chopped
3 courgettes/zucchini, grated
1/4 cup fresh coriander/cilantro chopped (optional)
4 eggs, beaten
1 1/2 cups fresh ricotta (preferably the solid, firm kind - but if it's runny just cut back on the milk)
3/4 cup milk
1 teaspoon baking powder
2/3 cup plain flour
generous grindings of salt and black pepper
oil

Allow cobs to cool for a few minutes before removing corn - lay cobs down horizontally on chopping board and use large knife to slice off. This prevents the corn covering your kitchen floor.

Combine corn with spring onions, coriander, courgettes and flour and baking powder. In a smaller bowl combine milk and ricotta with beaten eggs, then pour into the large bowl with rest of fritter ingredients.

Heat about one tablespoon of oil in a large frying pan on medium heat. I used rice bran oil as it heats to high temperatures and doesn't have any flavour, but olive oil works too. Once pan is hot, drop tablespoon lots of batter into pan (don't crowd in pan and keep them small - they cook quicker and look more appetising).

Cook until lightly browned on both sides, flipping once. Keep heat to medium so they cook through without burning. Remove first batch onto plate lined with paper towel, and repeat until mixture used up.

While these re-heat in the oven very well, you can keep the mixture in a sealed container in the fridge for a few days and impress your friends and family with fritters and eggs for brunch, fritters on the side of their chili beans, fritter sandwiches, etc.

And a very Happy Birthday to my father...

Saturday, February 5, 2011

RED SUMMER QUINOA SALAD WITH LIME, OLIVES AND MINT


Sydney evenings have been lingering in the 30s this week so when my friend Violet Tingle - My Darling Darlinghurst - invited me around for a blogging brainstorm, the only food to take was a salad. But it had to be a substantial salad.

I literally made this up as I went, Billie hanging over the kitchen/living room dividing barrier, but it's so good I'll be making it again and again. A very tasty vegetarian dish.

RED SUMMER QUINOA SALAD WITH OLIVES AND MINT

1 cup quinoa
1 3/4 cup cold water
1/2 t salt
2 red peppers/capsicums, finely chopped
3 tomatoes, chopped
1/2 cup mint, chopped
1/2 cup kalamata olives, chopped
1/4 cup sunflower seeds, toasted in a dry fry pan until lightly browned

Dressing:
3 cloves garlic, crushed/chopped finely
1 lime, juiced
1/4 cup extra virgin olive oil


Rinse quinoa and then place with the water and salt in small pot and bring to boil. Turn to low and simmer for 15-20 minutes or until water absorbed. Remove from heat and leave lid on for 5-10 minutes, then fluff with fork. Combine with rest of salad ingredients, then mix dressing and combine well. Serve at room temperature.

FOR BABIES 7 MONTHS AND UP: Make a little extra quinoa and puree.
FOR BABIES 9 MONTHS AND UP: Reserve some salad and puree a little, depending on teeth.
FOR BABIES AND TODDLERS 12 MONTHS AND UP: Serve salad as is.

Sunday, January 30, 2011

PARTY FOOD - HAPPY 2ND BIRTHDAY HENRY

Olives seem to be a hit with toddlers - or at least with Billie and her good friend Henry. And fresh sweet corn is Billie's no.1 vegetable. In fact, these days it's the only vegetable she eats without it being hidden.


So when I offered to contribute to Henry's 2nd birthday bash his lovely mother Emily requested "some of your rice cakes, but with olives, no feta and you could hide some courgette". I wound up filling them with lots of corn so I'm not sure Henry was impressed -  and there were too many toy diggers landing in his lap anyway. But the adults were.

Phew. There was a fair bit of competition this morning - several offerings of savoury muffin-type things. Even one from a fellow food blogger, Morsels & Musings. Anna served some delicious salmon and dill mini muffins. I have to confess Billie preferred those to her mother's vegetarian rice cakes. I'll have to chase Anna for the recipe.

My favorite today though was Emily's gazpacho served in shot sizes. Perfect for a hot January morning. I'm definitely going to follow that one up.


Olive, Corn and Courgette Rice Cakes

Billie chills out with an Olive, Corn and Courgette Rice Cake


All the savory bits were followed by lashing of sweets. Emily made a perfect chocolate cake for Henry. Moist, tasty and light. She did extremely well as first-time cake baker. It's a recipe I pulled out of a cookbook years ago, I don't even recall what book. All I know is the author credited it with their friend Dana - so it's Dana's Chocolate Cake.

But I will call it Magic Chocolate Cake. If you come across another cake recipe that DOES NOT CALL FOR ANY CREAMING of butter and sugar, please pass it on. When Emily mentioned she didn't own a cake mixer - neither do I - I insisted she try Dana's Chocolate Cake. It's easy and extremely good.

Henry gets ready for some Magic Chocolate Cake


Billie had chocolate for the second time in her life. I wish I had a shot of her and Henry post-cake.

The Magic Chocolate Cake recipe follows the Olive, Corn and Courgette Rice Cakes recipe.


OLIVE, CORN AND COURGETTE RICE CAKES
Makes 12-18

1 cup arborio rice - or other Italian
knob of butter
2 corn cobs, steamed
2 courgettes/zucchini, grated
3/4 cup pitted olives, chopped in half sideways 
1 cup grated cheddar cheese
generous grind of black pepper
salt
6 egg, beaten

Place rice in small pot filled with water and salt. Bring to simmer and simmer with lid off for about 12 minutes or until just done.  Drain and mix knob of butter through with fork. Leave to cool.

 Remove corn off cob by placing length-ways on chopping board and slicing with large knife. Place in large bowl with rest of ingredients. Mix well but gently with large fork.

Spoon into oiled muffin tins - depending on cup size this recipe will make between 12 and 18.

Place in preheated oven on medium-hot (200 c/400f). Cook for 15-20 minutes or until browned.

Remove from tins and cool on wire rack. Serve warm or cold. Perfect picnic fodder.

Emily and Henry start the jam


MAGIC CHOCOLATE CAKE

1 2/3 cups flour
1 1/2 tsp baking soda
1 1/2 cups sugar
2/3 cup cocoa powder
1 tsp salt
1 1/2 cups milk
100g butter, melted
2 eggs
1 tsp vanilla essence

Filling/Icing:
100g butter - soft
250g icing sugar
1/3 cup cocoa
 milk to mix
 1 tsp vanilla essence

Preheat oven to 180c/350f. Grease a 20cm loose-bottom cake tin and line the base with greaseproof paper. Put all the main ingredients in a food processor, or just mix by hand (very easy, remember - no creaming). Pour into the prepared tin and bake for at least 50 minutes.

The cake will rise a lot and when cooked the centre should spring back when gently pressed, or a skewer poked into the centre will come out clean.

To make the filling or icing, place butter and dry ingredients in food processor, pulse to combine. Again, no worries if you don't have one, a wooden spoon and bowl will do you fine.  Add a dash of milk, mix, and add tiny amounts of milk until achieve a thick, soft, spreadable icing. Add vanilla.

Slice cake in half horizontally and spread some icing on the lower half. Replace the top half and ice the whole cake. Alternatively, just leave cake intact and use all icing on the top. Leave to set and keep in sealed airtight container.


Birthday Super Mum Emily and myself

Sunday, January 23, 2011

DESERT INSPIRATIONS: SANTA FE BLACK BEAN SALAD

Santa Fe farmers' markets

Get ready for some superb Southwestern-inspired food. But first, Santa Fe is kind of the Disney Land of New Mexico. You wouldn't know this if you didn't venture further into the desert, to the mountain town of Taos say. Or even better - little Las Vegas - a town frequented by Billie the Kid and now a popular film set for Western-tinged films by the Coen Bros etc.

Santa Fe's New Mexico Museum of Art uses the faux-dobe made popular by the town's planning laws


But for wide-eyed tourists such as myself fresh off the train, it's hard not to fall for Santa Fe. Town planning laws dictate that all buildings must pay some homage to the traditional Adobe, invented by the Pueblo people - the traditional land owners. So you play the guessing game of which is the faux-dobe and which is the real mud brick. At least it all looks nice. Even the petrol stations.


Real adobe or faux-dobe?

Shell gets into the dobe-mode


It's not just the mud bricks that tourists flock to Santa Fe for. The town has become an eating destination, with it's own cuisine reproduced in many cookbooks and famous restaurants. Unfortunately I cannot report that our dining experience was anything to write home about  - probably because all the good ones were booked out or had queues longer than Billie could possibly stand. 

The best food we ate in Santa Fe was found right here on the plaza


However, we ate well throughout the rest of New Mexico and the US South West. It's a blend of Mexican, Native American - such as fry bread, corn and beans - and some other stuff tossed in.

Getting hungry? This fabulous salsa salad is easy to make and will impress most palettes. Last night I took it to Skye's birthday beach picnic, and there were enough recipe requests to pass the test.

And yes, Billie loves it. Nine-month-old Fig enjoyed a few mouthfuls last night too - although she preferred the beans to the corn.

I pinched this from my current favorite, Feeding the Whole Family, by Cynthia Lair. I've only made a couple of small adaptations. She suggests serving with tortillas or polenta but I have always used corn chips.

This recipe brings together some of my favorite ingredients: black beans, lime, corn, fresh coriander/cilantro and red pepper/capsicum. Served with a bowl of corn chips, it makes a fantastic dish to share. It can be prepared a few hours ahead of time, so good for outings.


SANTA FE BLACK BEAN SALAD

2 cups cooked black beans  (1 1/2 cups dried or one 400g tin = 1 1/2 cups)
1 red pepper
1 corn cob, steamed (or 1/2 cup frozen/tinned corn but use fresh if you can)
1/2 cup chopped fresh coriander/cilantro
plain corn chips, to serve

Dressing:
3 cloves garlic
1/2 teaspoon salt
2 Tablespoons extra virgin olive oil
4 Tablespoons lime juice = one lime
1/8 teaspoon cayenne pepper (use 1/4 if not serving to any kids)

Soak and boil/pressure cook the black beans. They only take 15-20 minutes in pressure cooker if been soaked a few hours. About three times as long if you regular boil in a pot, after soaking. Or open a can or two.

Next, roast red pepper/capsicum to char the skin for easy removal. You can do it under a grill or directly over the low flame of a gas burner. Turn until skin charred on all sides. Place inside paper bag and close to allow pepper to sweat - this will make skin easier to remove. After about ten minutes - or longer if you can wait - the skin should slip off. Slice pepper into thin strips and then chop strips in half.

Meanwhile, steam whole corn cob - again only takes 5 mins in pressure cooker, 10-15 mins probably in regular pot. Let cool then place sideways on board and slice kernels off in strips. Place strips in large bowl with beans, coriander and pepper. Mix gently.

To make dressing: Mince garlic and salt to a paste, either in pestle and mortar or on bread board with a knife. Place in small bowl and whisk in oil, lime juice and cayenne pepper. Pour over salad and toss gently.

Serve with corn chips. If you go for the more spicy option, a bit of yoghurt on the side works well. And if you are feeling energetic, or you want to make the meal go further, the salad partners very well with guacamole. 

My suggestions for making this work for all ages:
BABIES AGED SIX MONTHS AND OLDER: Make a little extra corn and puree
BABIES/TODDLERS AGED NINE MONTHS AND OLDER: Set aside a little beans and corn
TODDLERS AGED ONE YEAR AND OLDER: Serve as is - check seasoning


And now, I can't resist a little garden update. 
Just two weeks on, and we have several small green tomatoes and one little courgette. 


The tomato plants are topping their stakes, and the aubergine plants are getting huge too. The poor lettuce, spinach and basil are getting a bit overwhelmed by the growth of their neighbors, losing a fair bit of their sun. Next time I would put tomatoes in their own patch I think.

Friday, January 14, 2011

WELCOME BACK, TO A BUMPER CROP

 Happy New Year billie biters. Hope you had a relaxing break.


Jan 09 2011


We were very excited to return home, from camping on the NSW Far South Coast, to find a blooming vegetable garden.  The frequent rain showers sprinkled between hot sunshine in Sydney gave our little veggie patch a much-needed boost. Before we left I was stressing that gardening was all about the PROCESS, ya know. Watching those SEEDS sprout and mature and survive the great transplant. Well, now I can happily revise that. It's feeding us too - a little.


Our first garden feast featured spinach, lettuce and basil from the no-dig garden we created in late October. Gardening partners Emily and Henry Besser (Billie's best mate) brought bread and tomatoes, and the best sandwiches I have eaten all decade were had. And only a metre from where the seedlings grew.

First pickings, 9/1/11


Soon to come on the garden menu will be tomatoes, aubergine/eggplant and red pepper/capsicum followed by courgette/zucchini. Dill seedlings are thriving. I have also impressed my neighbor Lauren (who kept a close watch over the garden while we were camping) with some coriander seedlings. They did take a couple of attempts. Thanks also go to Miream for the lettuce and courgette seedlings, brought to life down the road in Randwick.


When Emily, Miles and I built the no-dig garden in the spring, we simply followed some directions pulled off google - layering up with newspaper, straw, manure and a bit of dirt and compost. We omitted the hay because it was impossible to find in Sydney. We should have used cardboard because the weeds are very feisty.

Next we planted seeds in egg cartons, sat them in old plastic takeaway containers on my sunny kitchen windowsill, and delighted in their speedy growth. All was fine, except I left them too long and many dried out and died. A couple of the spinach and tomato survived and are now huge. But the next batch of seedlings I transplanted after just a week or so. Coriander can't seem to survive transplanting so I stuck the whole egg carton straight in the garden once big enough to cope outdoors. The dill seeds I planted in a plastic pot, after the first batch failed to transplant. 

First transplanting of seedlings, Nov 26

Billie and Henry water seedlings after first transplant 26/11/10


I learned from a little organic gardening workshop mid-way through that our seedlings were struggling for lack of fertiliser. So they have since benefited from a fortnightly does of a seaweed concentrate and another organic mix that contains nitrogen.

So it's been a learning journey, and we're still very much novices. But that doesn't stop us screaming from the roof-tops: WE ARE GROWING A BUMPER CROP IN OUR LITTLE VEGETABLE PATCH!

 Today I will make our first home-grown salad to take to lunch with Giles and Anna and Bruno at Giles' art studio. Of course I'll wait until we're about to leave before picking the spinach, lettuce and herbs so I can shout ONE HOUR OLD VEGETABLES  ON YOUR TABLE!


I've just been listening to a re-run of a great discussion on vegetarianism. ABC Radio National looks at the growth in popularity of vegetarianism, as more people question what they're eating and the environmental cost of producing it. The show debunks some nutritional myths about a meat-free diet with Dr Rosemary Stanton.  Check it out:  Vegetarianism on ABC Radio National's Life Matters

Followers